
In my last article, I’ve introduced how to create VPC. In this article, let’s prepare EC2 instance as Web server.
- Web site can be accessed on the Internet with FQDN
- Basic LAMP environment (Linux, Apache, PHP, MySQL)
- No redundant configuration and backup
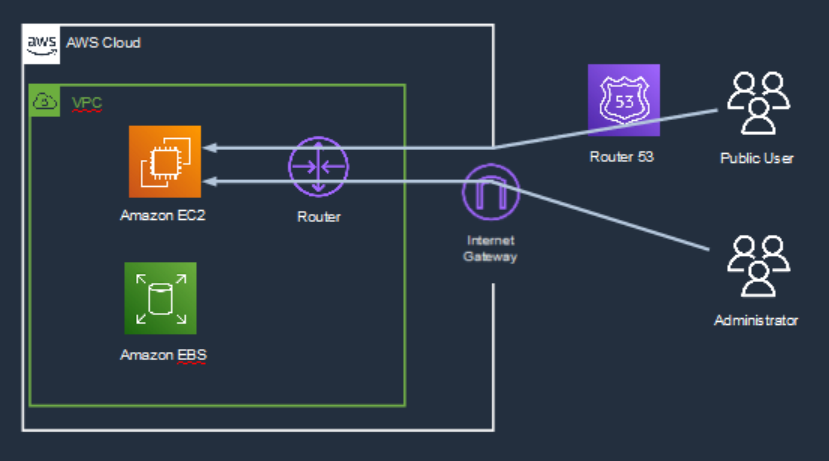
System Configuration diagram is as below. Public Users access Web site through Route53 with FQDN. On the other hand, Administrator access to Web site via Internet Gateway.
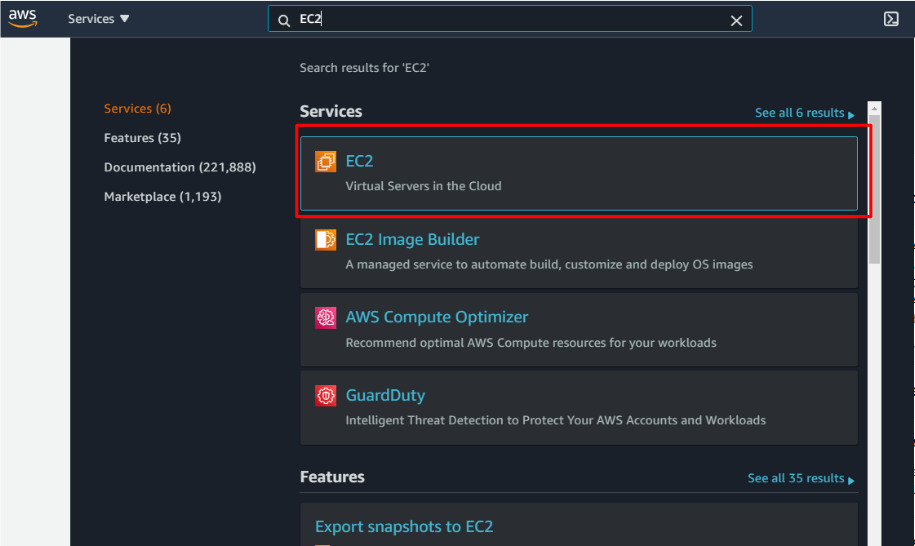
Next, let’s create EC2 instance in the VPC you’ve created. Click EC2 button.
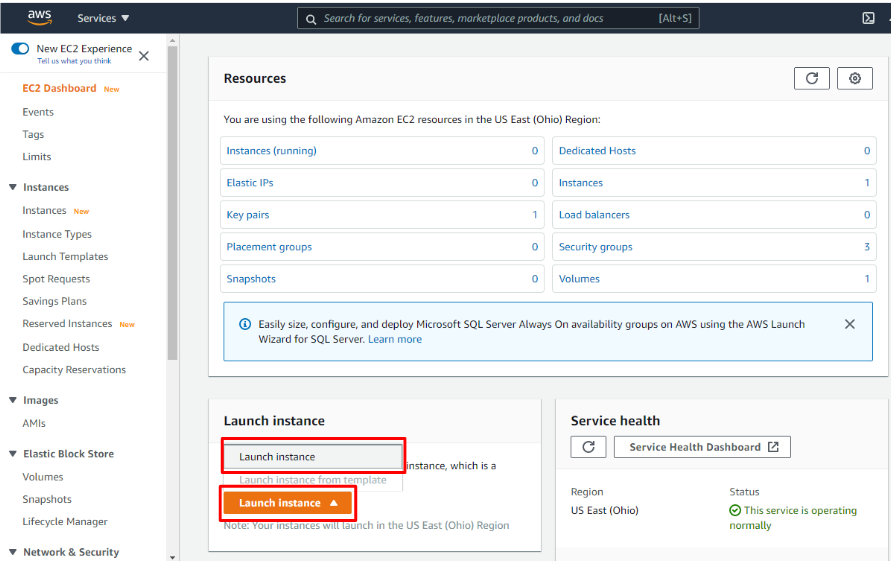
Then, move the cursor to “Launch Instance”, and click “Launch Instance” appeared above.
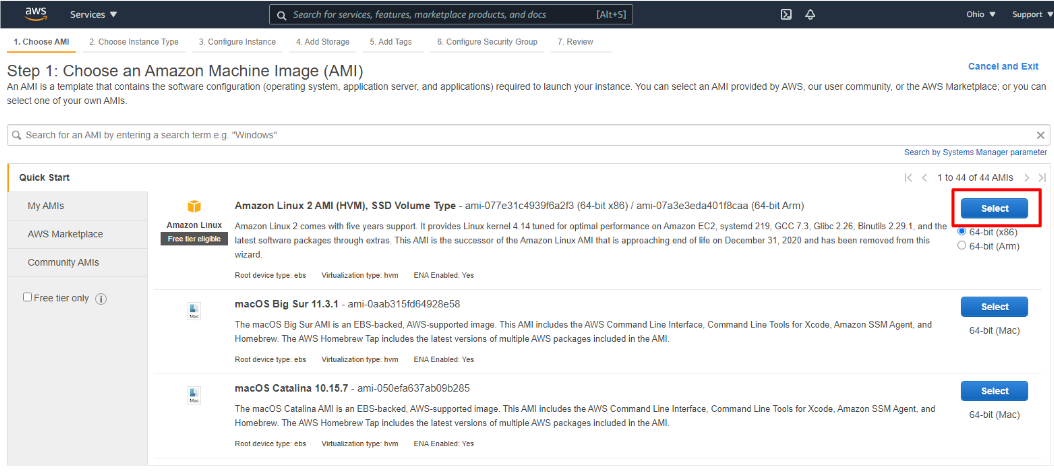
Next, select AMI. This time, I select Amazon Linux2 AMI because this AMI is optimized for AWS EC2 instance. Click “Select” button of Amazon Linux.
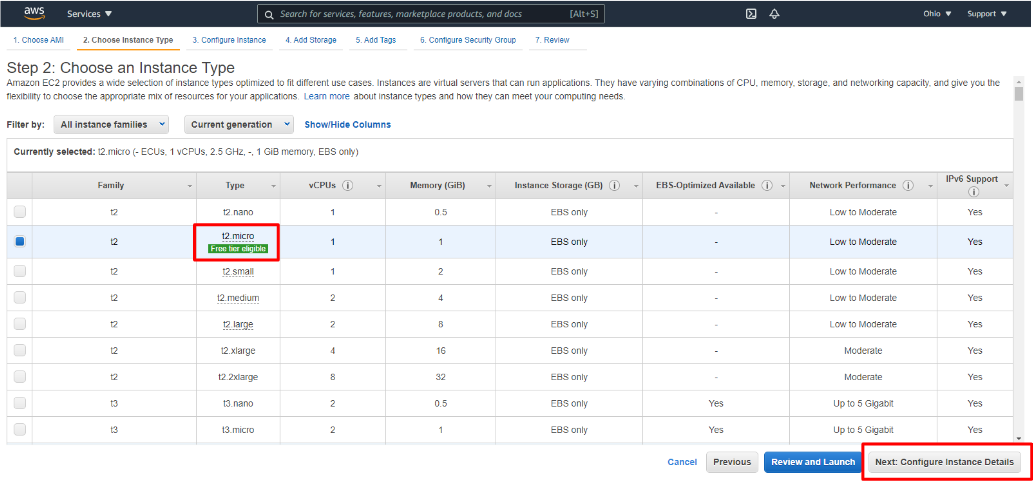
 Next, choose an instance type. It needs to be selected depending on the amount of access to your web site. In this case, I selected t2 micro as a demonstration. Check “t2 micro” and click “Next Configure Instance Details”
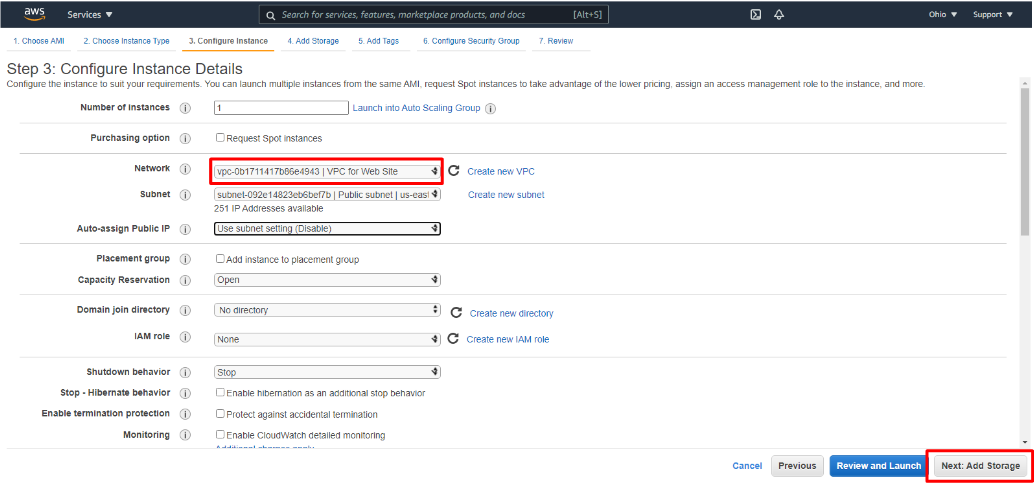
Next, select VPC you’ve crated in the “Network” field. And click “Next: Add Storage”.
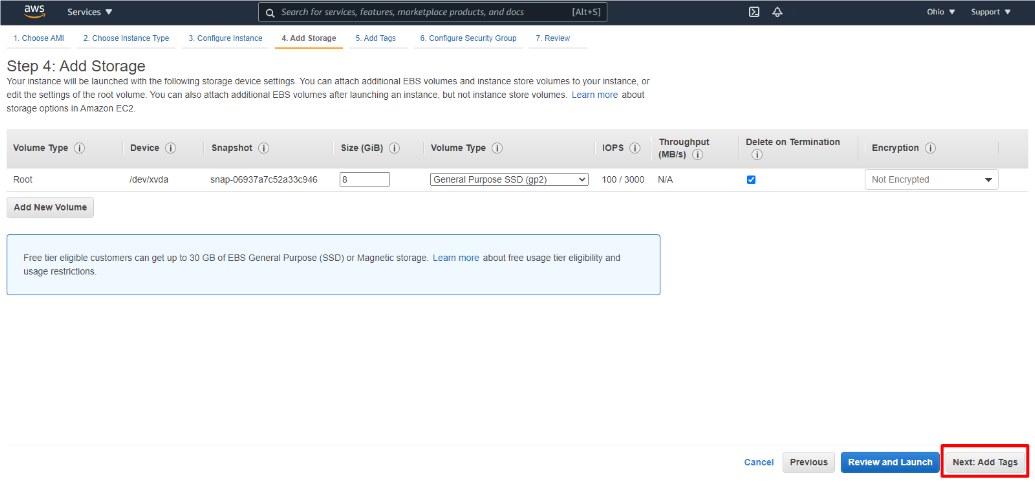
Then, decide the storage size. It depends on the size of your Web site. In this case, I remained it to default value, 8GiB, as a demonstration. And click “Next: Add Tags”
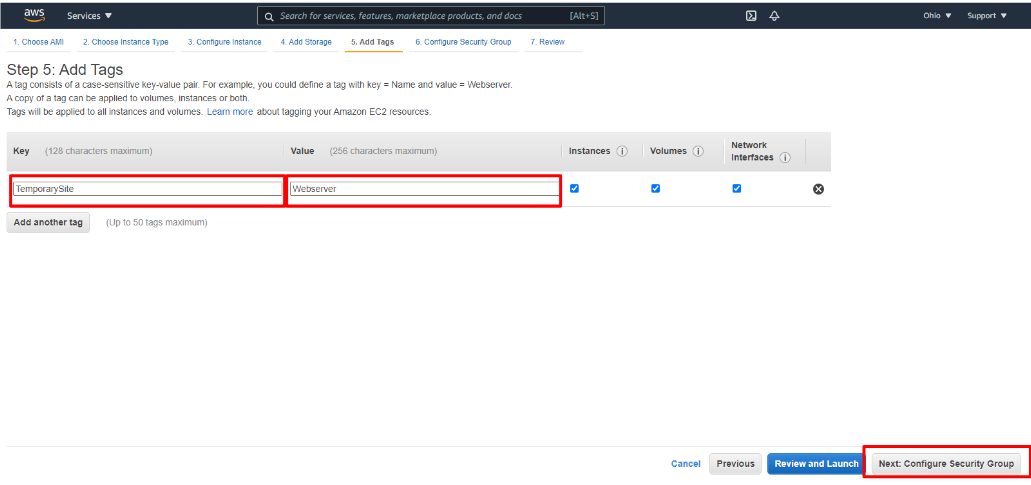
Next step is Tags addition. Although it is optional setting, it is useful for the server management in the future. Let’s input Key and Value that you can recognize this resource easily. And Click “Next: Configure Security Group”.
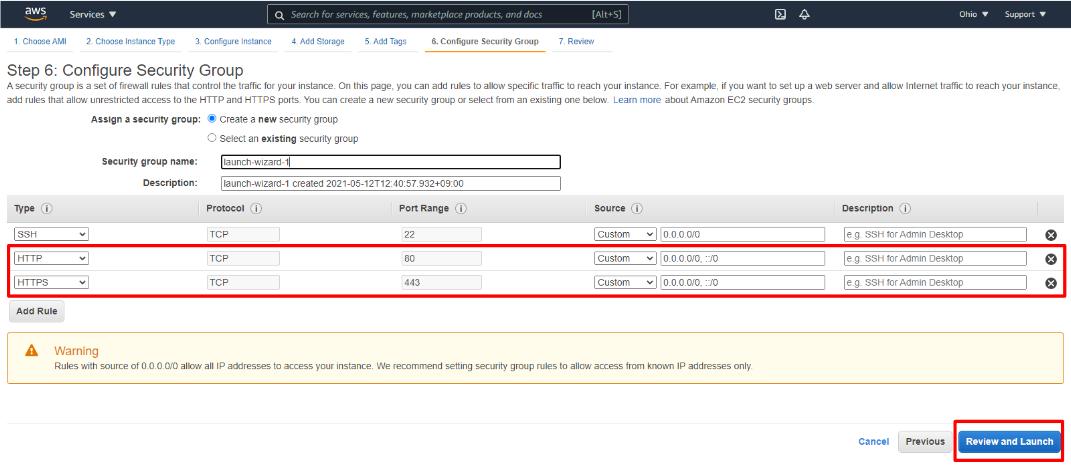
Next step is configuring security group. Please add HTTP and HTTPS rules in addition to default SSH rule. And click “Review and Launch”.
If there is no mistake, click “Launch” button.

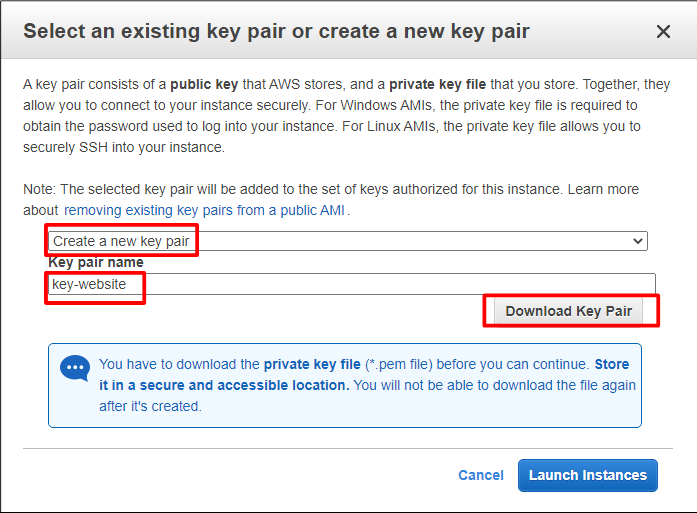
After clicking “Launch” button, a window related to key pair will be appeared. If you have no key, select “Create a new key pair” and input Key pair name as you like. Then, download Key pair for SSH access. Do not delete the key pair because you cannot access EC2 instance by SSH without this Key pair.
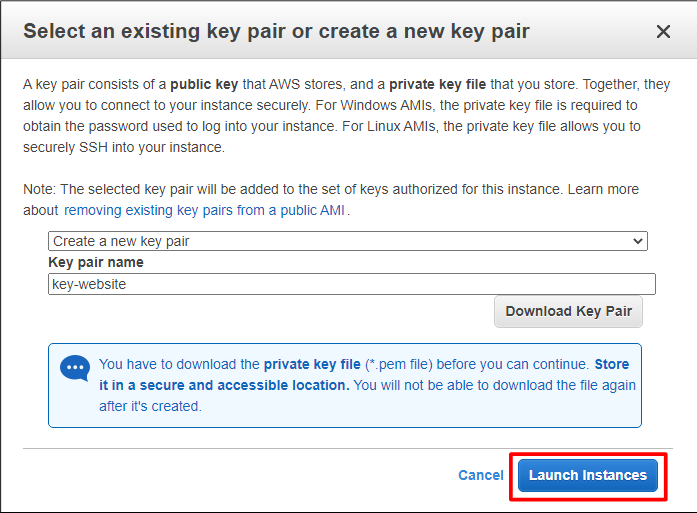
After downloading the Key pair, click “Launch Instances”.
You can see the message, “Your instances are now launching”. Then, click “View instances”.
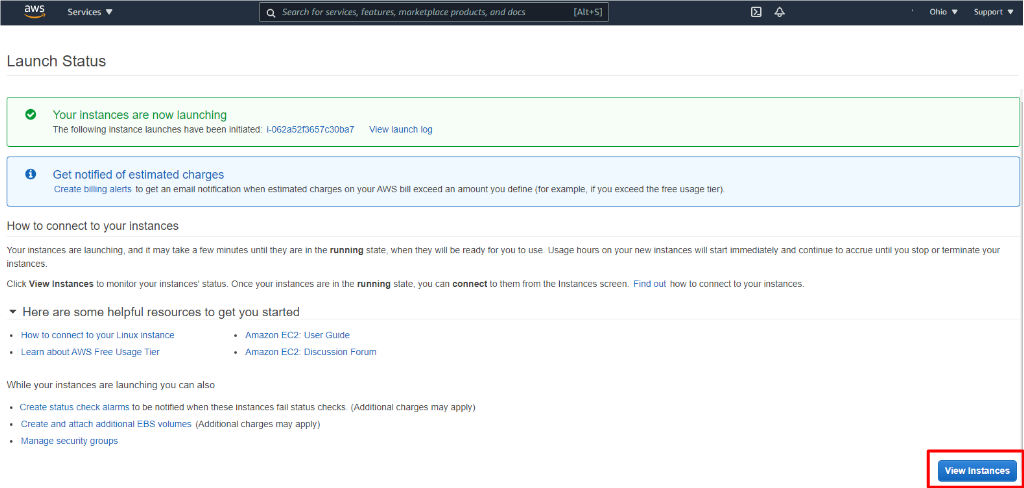
Successfully created new EC2 instance and its status becomes “Running”.


コメント